Homemade Apple Butter (Rich, Spiced, and Deeply Caramelized)
This slow-cooked homemade apple butter is thick, silky, and perfumed with warm spices. Spread it on toast, swirl it into oatmeal, or gift it in jars for a cozy autumn treat.

The Apple Butter You Will Make Every Single Fall
There is a moment, about an hour into making apple butter, when your entire kitchen smells like a warm spice market crossed with a cider mill. The windows fog slightly. The pot gurgles quietly. That moment alone is worth the recipe.
Apple butter is not actually butter at all. It contains no dairy. The name comes from its texture: cooked down so slowly and so thoroughly that the apples become something dense, spreadable, and impossibly silky, almost like soft butter. What you get in the end is deeply caramelized, warmly spiced, and far more complex than anything you will find on a grocery store shelf.
This is the kind of recipe that rewards patience. It is not fast, but it is almost entirely hands-off, and the results are breathtaking.
Why Homemade Beats Store-Bought Every Time
Most commercial apple butters lean heavily on added sugar and skip the actual slow-caramelization step that makes the flavor sing. When you make it at home, you control everything: the apple variety, the spice balance, and how far you let it cook down.
The deeper you let it go, the better it gets. That dark amber color is not just visual. It means the sugars have caramelized, the water has evaporated, and what remains is pure, concentrated apple flavor.
A few tricks that make the difference:
- Use a mix of apples. Sweet apples give body; tart apples give brightness.
- Unfiltered apple cider adds a depth that plain water simply cannot replicate.
- Patience during the uncovered reduction is what separates good apple butter from great apple butter.
Chef's Tip: Do not rush the final reduction. If your apple butter is still spreading like jam when you drop a spoonful on a cold plate, it needs more time. The target is a firm, slow mound that holds its shape.
Using the right pot makes a real difference here. A heavy Dutch oven distributes heat evenly and prevents scorching during the long reduction, and a quality immersion blender turns the cooked apples into a glass-smooth puree in under a minute.
Tools & Ingredients We Recommend


How to Know When It Is Done
This is the question everyone asks. The honest answer is: trust your eyes and your spoon, not the clock. Cooking times can vary by 30 to 45 minutes depending on the water content of your apples.
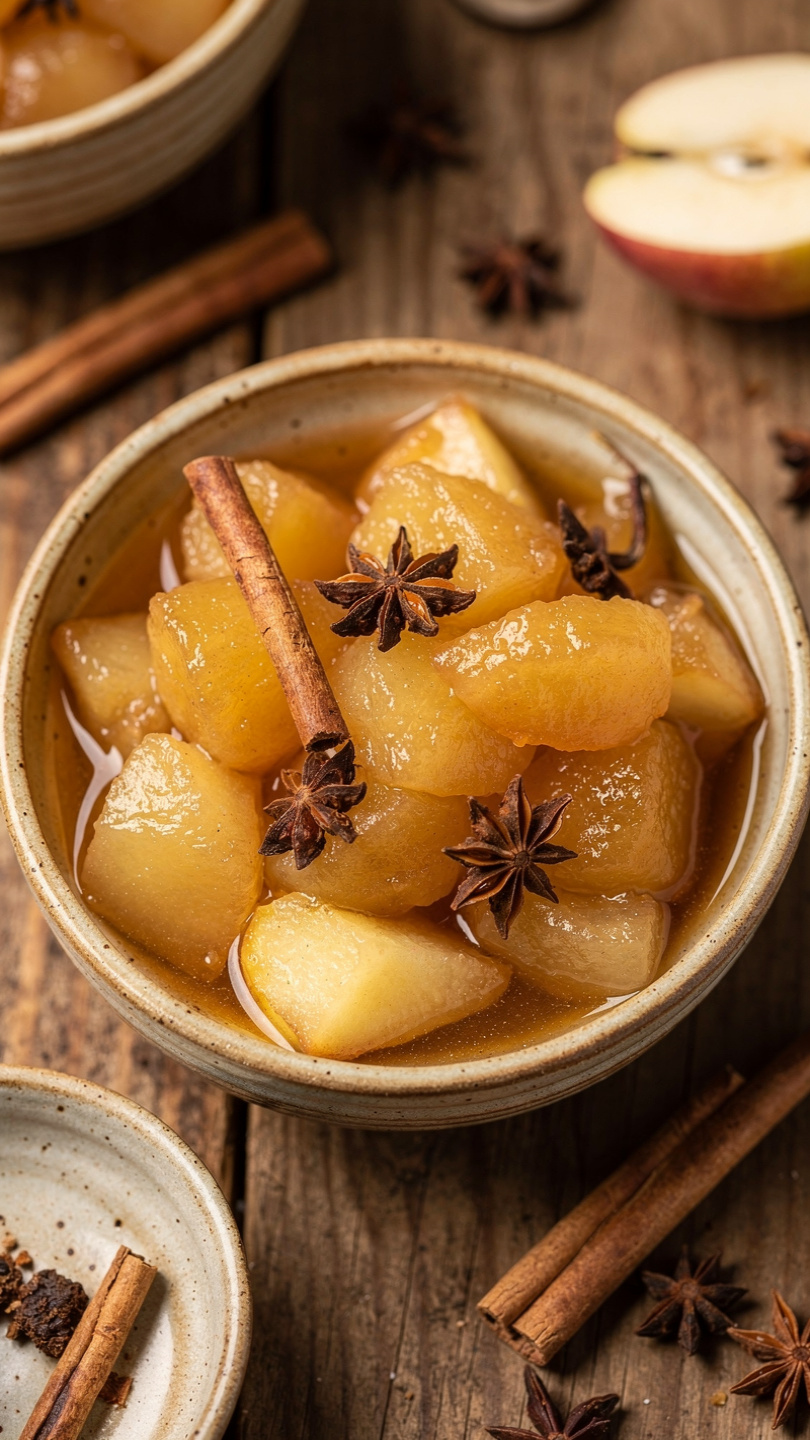
Your apple butter is ready when:
- It has turned a deep, burnished amber brown
- A spoonful dropped onto a cold plate holds a firm mound and does not weep liquid around the edges
- It has reduced to roughly half its original volume
- The surface has gone from a rolling bubbling to a thick, slow plopping
Once you hit that stage, pull it off the heat and stir in the vanilla. The aroma will be extraordinary.
Endless Ways to Use It
Apple butter is one of those ingredients that quietly improves everything it touches:
- Spread thickly on sourdough toast or a warm biscuit
- Swirled into morning oatmeal or overnight oats
- Used as a filling for crepes, thumbprint cookies, or hand pies
- Layered into a grilled cheese sandwich with sharp cheddar
- Spooned over vanilla ice cream or cheesecake
- Given in a pretty jar as a hostess or holiday gift
It is also spectacular as a glaze on roasted pork tenderloin if you want to take it into savory territory.
Ready to make a batch? Here is everything you need:
Homemade Apple Butter (Rich, Spiced, and Deeply Caramelized)
This slow-cooked homemade apple butter is thick, silky, and perfumed with warm spices. Spread it on toast, swirl it into oatmeal, or gift it in jars for a cozy autumn treat.
Ingredients
- 5 lb apples, peeled, cored, and roughly chopped. A mix of Fuji, Honeycrisp, and Granny Smith works beautifully
- 3/4 cups granulated sugar, adjust to taste depending on the sweetness of your apples
- 1/2 cups packed brown sugar, light or dark both work
- 1/2 cups apple cider, unfiltered for the best flavor
- 2 tsp ground cinnamon
- 1/4 tsp ground cloves
- 1/4 tsp ground allspice
- 1 tsp vanilla extract, pure, not imitation
- 1 tbsp fresh lemon juice, brightens and balances the sweetness
- 1/4 tsp kosher salt
Instruction
Peel, core, and roughly chop all the apples into 1-inch pieces. Precision is not important here since everything will be cooked down.
Add the chopped apples and apple cider to a large, heavy-bottomed pot or Dutch oven. Bring to a simmer over medium heat, cover, and cook for 20 to 25 minutes, stirring occasionally, until the apples are completely soft and beginning to fall apart.
Remove the pot from the heat. Using an immersion blender, puree the apple mixture until completely smooth. Alternatively, transfer in batches to a blender and blend until silky.
Stir in the granulated sugar, brown sugar, cinnamon, cloves, allspice, salt, and lemon juice. Return the pot to the stove over medium-low heat.
Cook uncovered, stirring frequently, for 1.5 to 2.5 hours. The butter is ready when it has reduced by about half, turned a deep amber brown, and holds a mound on a spoon without spreading. The mixture will splatter as it thickens, so use a splatter screen if you have one.
Remove from heat and stir in the vanilla extract. Taste and adjust sugar or spices as needed.
Transfer the hot apple butter into clean glass jars. For refrigerator storage, let cool completely before sealing. For shelf-stable canning, process in a water bath canner for 10 minutes per standard canning instructions.
Equipment
- Large Dutch oven or heavy-bottomed pot
- Immersion blender or countertop blender
- Wooden spoon or silicone spatula
- Splatter screen
- Glass mason jars with lids
- Ladle
Notes
Storing and Gifting Your Apple Butter
For everyday use, a clean glass jar in the refrigerator will keep your apple butter fresh for up to 3 weeks. If you made a large batch and want to share it, freeze in small jars for up to 6 months. The texture holds beautifully after thawing.
For shelf-stable gifting, process filled jars in a water bath canner for 10 minutes. Properly sealed jars will keep in a cool, dark pantry for up to a year, making this one of the most giftable things you can make in autumn. Tie a piece of twine around the lid, add a handwritten label, and you have something genuinely special.