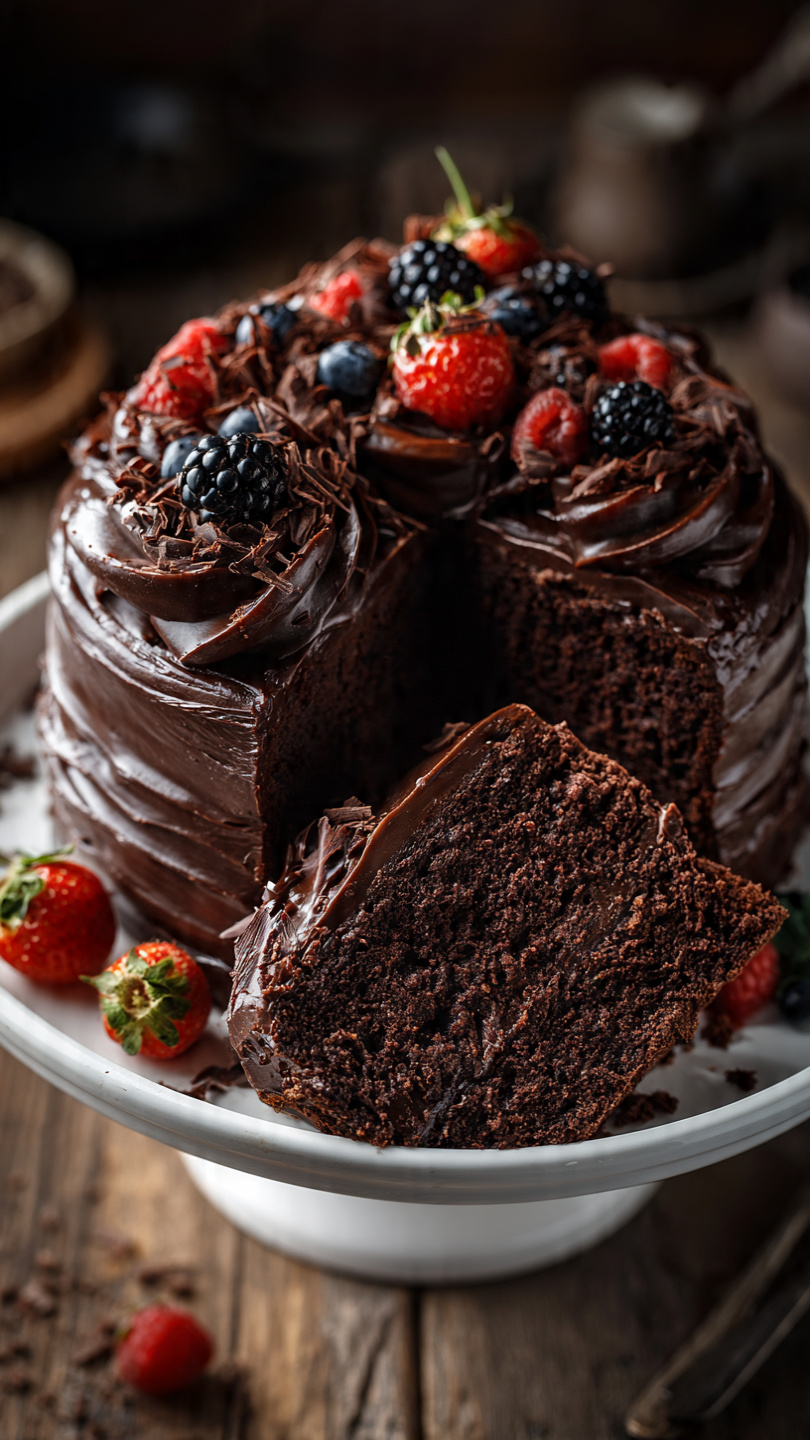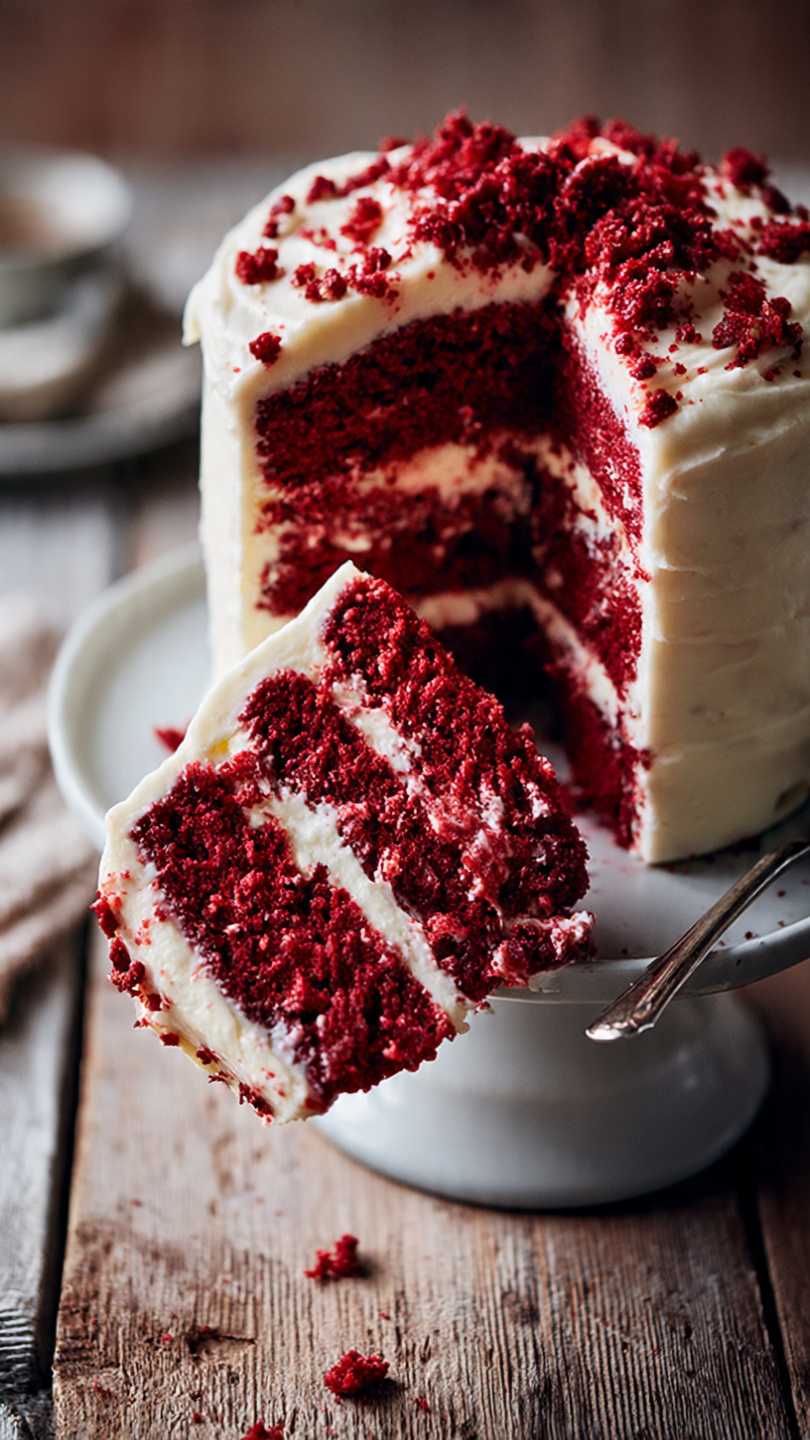
Classic Red Velvet Cake with Cream Cheese Frosting
This showstopping Classic Red Velvet Cake is tender, velvety, and layered with luscious cream cheese frosting. Perfect for birthdays, holidays, or any time you want to impress.

The Red Velvet Cake That Belongs at Every Celebration
There are cakes, and then there is red velvet. With its striking crimson crumb, whisper of cocoa, and tangy cream cheese frosting, this cake has earned its place as one of the most beloved American classics. Whether it is the centerpiece of a birthday, a Valentine's Day treat, or simply a weekend baking project you have been putting off, this recipe delivers the real deal: moist, velvety layers and a frosting so good you will want to eat it by the spoonful.
What makes red velvet special is not just the color. It is the balance. A small amount of cocoa adds depth without making it a full chocolate cake. The buttermilk and vinegar react with the baking soda to create an incredibly tender crumb. And that cream cheese frosting brings just enough tang to cut through the sweetness. Every bite is intentional.
What Makes This Recipe Work
Red velvet has a reputation for being temperamental, but the secret to success is straightforward: use quality ingredients and do not overmix the batter. Overmixing develops gluten and leads to a tough, dense cake instead of the soft, pillowy layers you are after.
A few things that genuinely matter here:
- Buttermilk is non-negotiable. It reacts with the vinegar and baking soda to lift the crumb and keep it tender.
- Gel food coloring gives you that vivid, deep red without thinning the batter the way liquid coloring can.
- Room temperature ingredients for the frosting mean a silky smooth finish with no lumps.
Using the right tools makes the whole process smoother and more enjoyable. A good stand mixer, a reliable offset spatula, and sturdy 9-inch cake pans will take you from home baker to cake shop quality.
Tools & Ingredients We Recommend


How to Get That Perfect Red Color
The color question comes up every time. Traditional red velvet gets its hue from a reaction between natural cocoa and acidic ingredients, but in modern recipes, food coloring does the heavy lifting. Here is what works best:
Chef's Tip: Use gel food coloring rather than liquid. Gel is more concentrated, so 2 tablespoons gives you a rich, jewel-toned red without adding excess liquid to your batter. Start with 1.5 tablespoons if you prefer a subtler tone.
If you want to go food-coloring-free, beet powder is a natural alternative that lends a beautiful earthy red, though the flavor is slightly earthier as well.
Building the Perfect Cream Cheese Frosting
The frosting is just as important as the cake itself. This version uses full-fat cream cheese and real butter for a frosting that is rich, tangy, and spreadable without being runny. A few tips:
- Beat the cream cheese and butter together before adding the powdered sugar. This prevents lumps.
- Sift your powdered sugar to keep the frosting smooth.
- If the frosting feels too soft to work with, refrigerate it for 15 minutes before spreading.
A crumb coat, a thin first layer of frosting that traps loose crumbs, is the professional trick that keeps your final layer looking clean and polished.
Ready to bake your best red velvet cake yet? Here is everything you need:
Classic Red Velvet Cake with Cream Cheese Frosting
This showstopping Classic Red Velvet Cake is tender, velvety, and layered with luscious cream cheese frosting. Perfect for birthdays, holidays, or any time you want to impress.
Ingredients
- 2 1/2 cups all-purpose flour, spooned and leveled
- 2 tbsp unsweetened cocoa powder
- 1 tsp baking soda
- 1/2 tsp fine salt
- 1 1/2 cups granulated sugar
- 1 cup vegetable oil
- 2 large eggs, room temperature
- 1 cup buttermilk, room temperature
- 2 tbsp red food coloring, liquid gel recommended for deeper color
- 1 tsp pure vanilla extract
- 1 tsp white vinegar
- 16 oz full-fat cream cheese, softened to room temperature
- 1/2 cup unsalted butter, softened to room temperature
- 4 cups powdered sugar, sifted
- 1 tsp pure vanilla extract, for the frosting
Instruction
Preheat your oven to 350 degrees F (175 degrees C). Grease and flour two 9-inch round cake pans, then line the bottoms with parchment paper circles.
In a medium bowl, whisk together the flour, cocoa powder, baking soda, and salt. Set aside.
In a large bowl, beat the granulated sugar and vegetable oil together until combined and slightly lighter in color, about 2 minutes.
Add the eggs one at a time to the sugar-oil mixture, beating well after each addition. Mix in the vanilla extract.
Stir the red food coloring and white vinegar into the buttermilk.
Alternately add the flour mixture and the buttermilk mixture to the batter, beginning and ending with the flour mixture. Mix just until combined after each addition. Do not overmix.
Divide the batter evenly between the two prepared cake pans and smooth the tops with a spatula.
Bake for 30 to 35 minutes, or until a toothpick inserted into the center comes out clean.
Let the cakes cool in the pans for 10 minutes, then turn them out onto a wire rack and allow them to cool completely before frosting.
To make the frosting, beat the softened cream cheese and butter together on medium-high speed until smooth and fluffy, about 3 minutes.
Reduce speed to low and gradually add the sifted powdered sugar, then mix in the vanilla. Once incorporated, increase speed to medium-high and beat for 1 more minute until light and creamy.
Place one cake layer on a serving plate or cake board. Spread a generous layer of cream cheese frosting over the top. Place the second layer on top.
Apply a thin crumb coat of frosting to the entire outside of the cake and refrigerate for 20 minutes. Then frost the top and sides with the remaining frosting.
Optionally, crumble a small piece of the cake and sprinkle the crumbs over the top as decoration. Slice and serve.
Equipment
- Two 9-inch round cake pans
- Parchment paper
- Stand mixer or hand mixer
- Large mixing bowl
- Medium mixing bowl
- Whisk
- Rubber spatula
- Wire cooling rack
- Offset spatula or bench scraper
- Cake board or serving plate
Notes
Serving, Storing, and Variations
Serving: Red velvet cake is best served at or near room temperature. If it has been refrigerated, pull it out about 20 to 30 minutes before slicing so the frosting softens slightly and the crumb relaxes.
Storing: Cover the frosted cake and keep it in the refrigerator for up to 5 days. Individual slices can be frozen for up to 2 months.
Variations worth trying:
- Cupcakes: Use the same batter to make 24 cupcakes. Bake at 350 degrees F for 18 to 20 minutes.
- Sheet cake: Pour the batter into a greased 9x13-inch pan and bake for 35 to 40 minutes for an easier, crowd-friendly version.
- Chocolate swirl: Swirl a tablespoon of melted dark chocolate through the batter just before baking for a dramatic visual and deeper flavor.
However you slice it, this red velvet cake is the kind of recipe that earns you compliments every single time.